Add Smart Devices
You can add your purchased smart devices to Home Assistant, such as smart sound, smart desk lamp, etc. You can also make your DIY device with ESP32 and add it in.
In this section, you will learn how to add your smart devices.
1. Configure the Smart Device
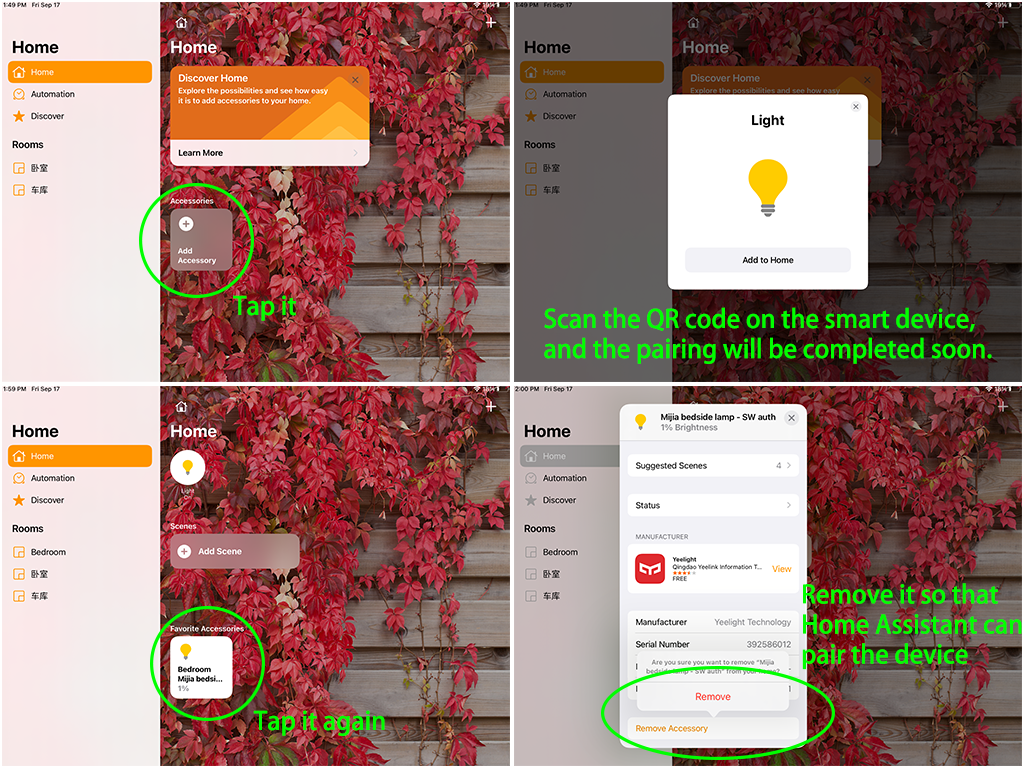
You need to make sure that your smart device has been assigned an IP. You can complete this step through the corresponding APP of the smart device. For example, the picture below shows a bedside lamp configured with HomeKit.
2. Add Integration
Now, visit http://ip:8123 to access your Home Assistant, then click Configuration in the left column and select Intergrations.

If Home Assistant finds a device on your network, it will display the corresponding integration, which can be easily added with just a few clicks.
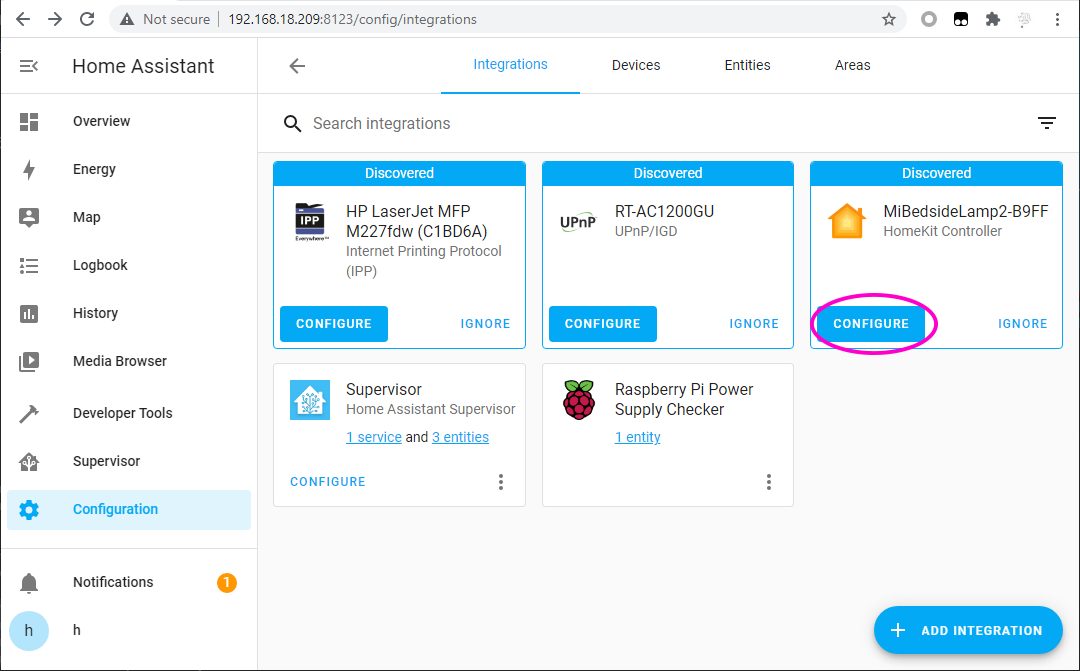
If your smart device has not been discovered yet, don’t worry, click the + ADD INTEGRATION button at the bottom right and search for your integration in the list.
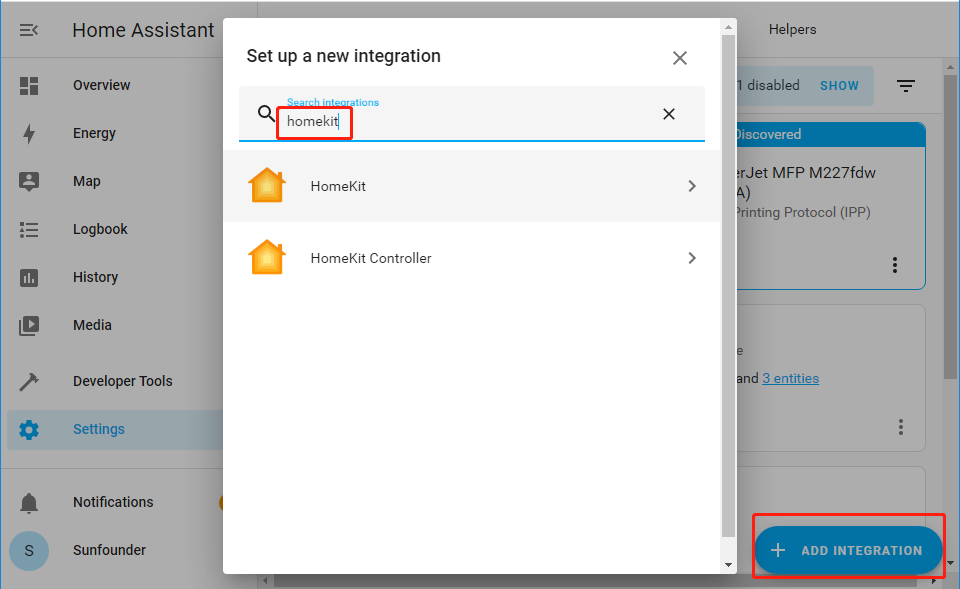
Each integration may be different in use, you can visit Home Assistant Integration for details.
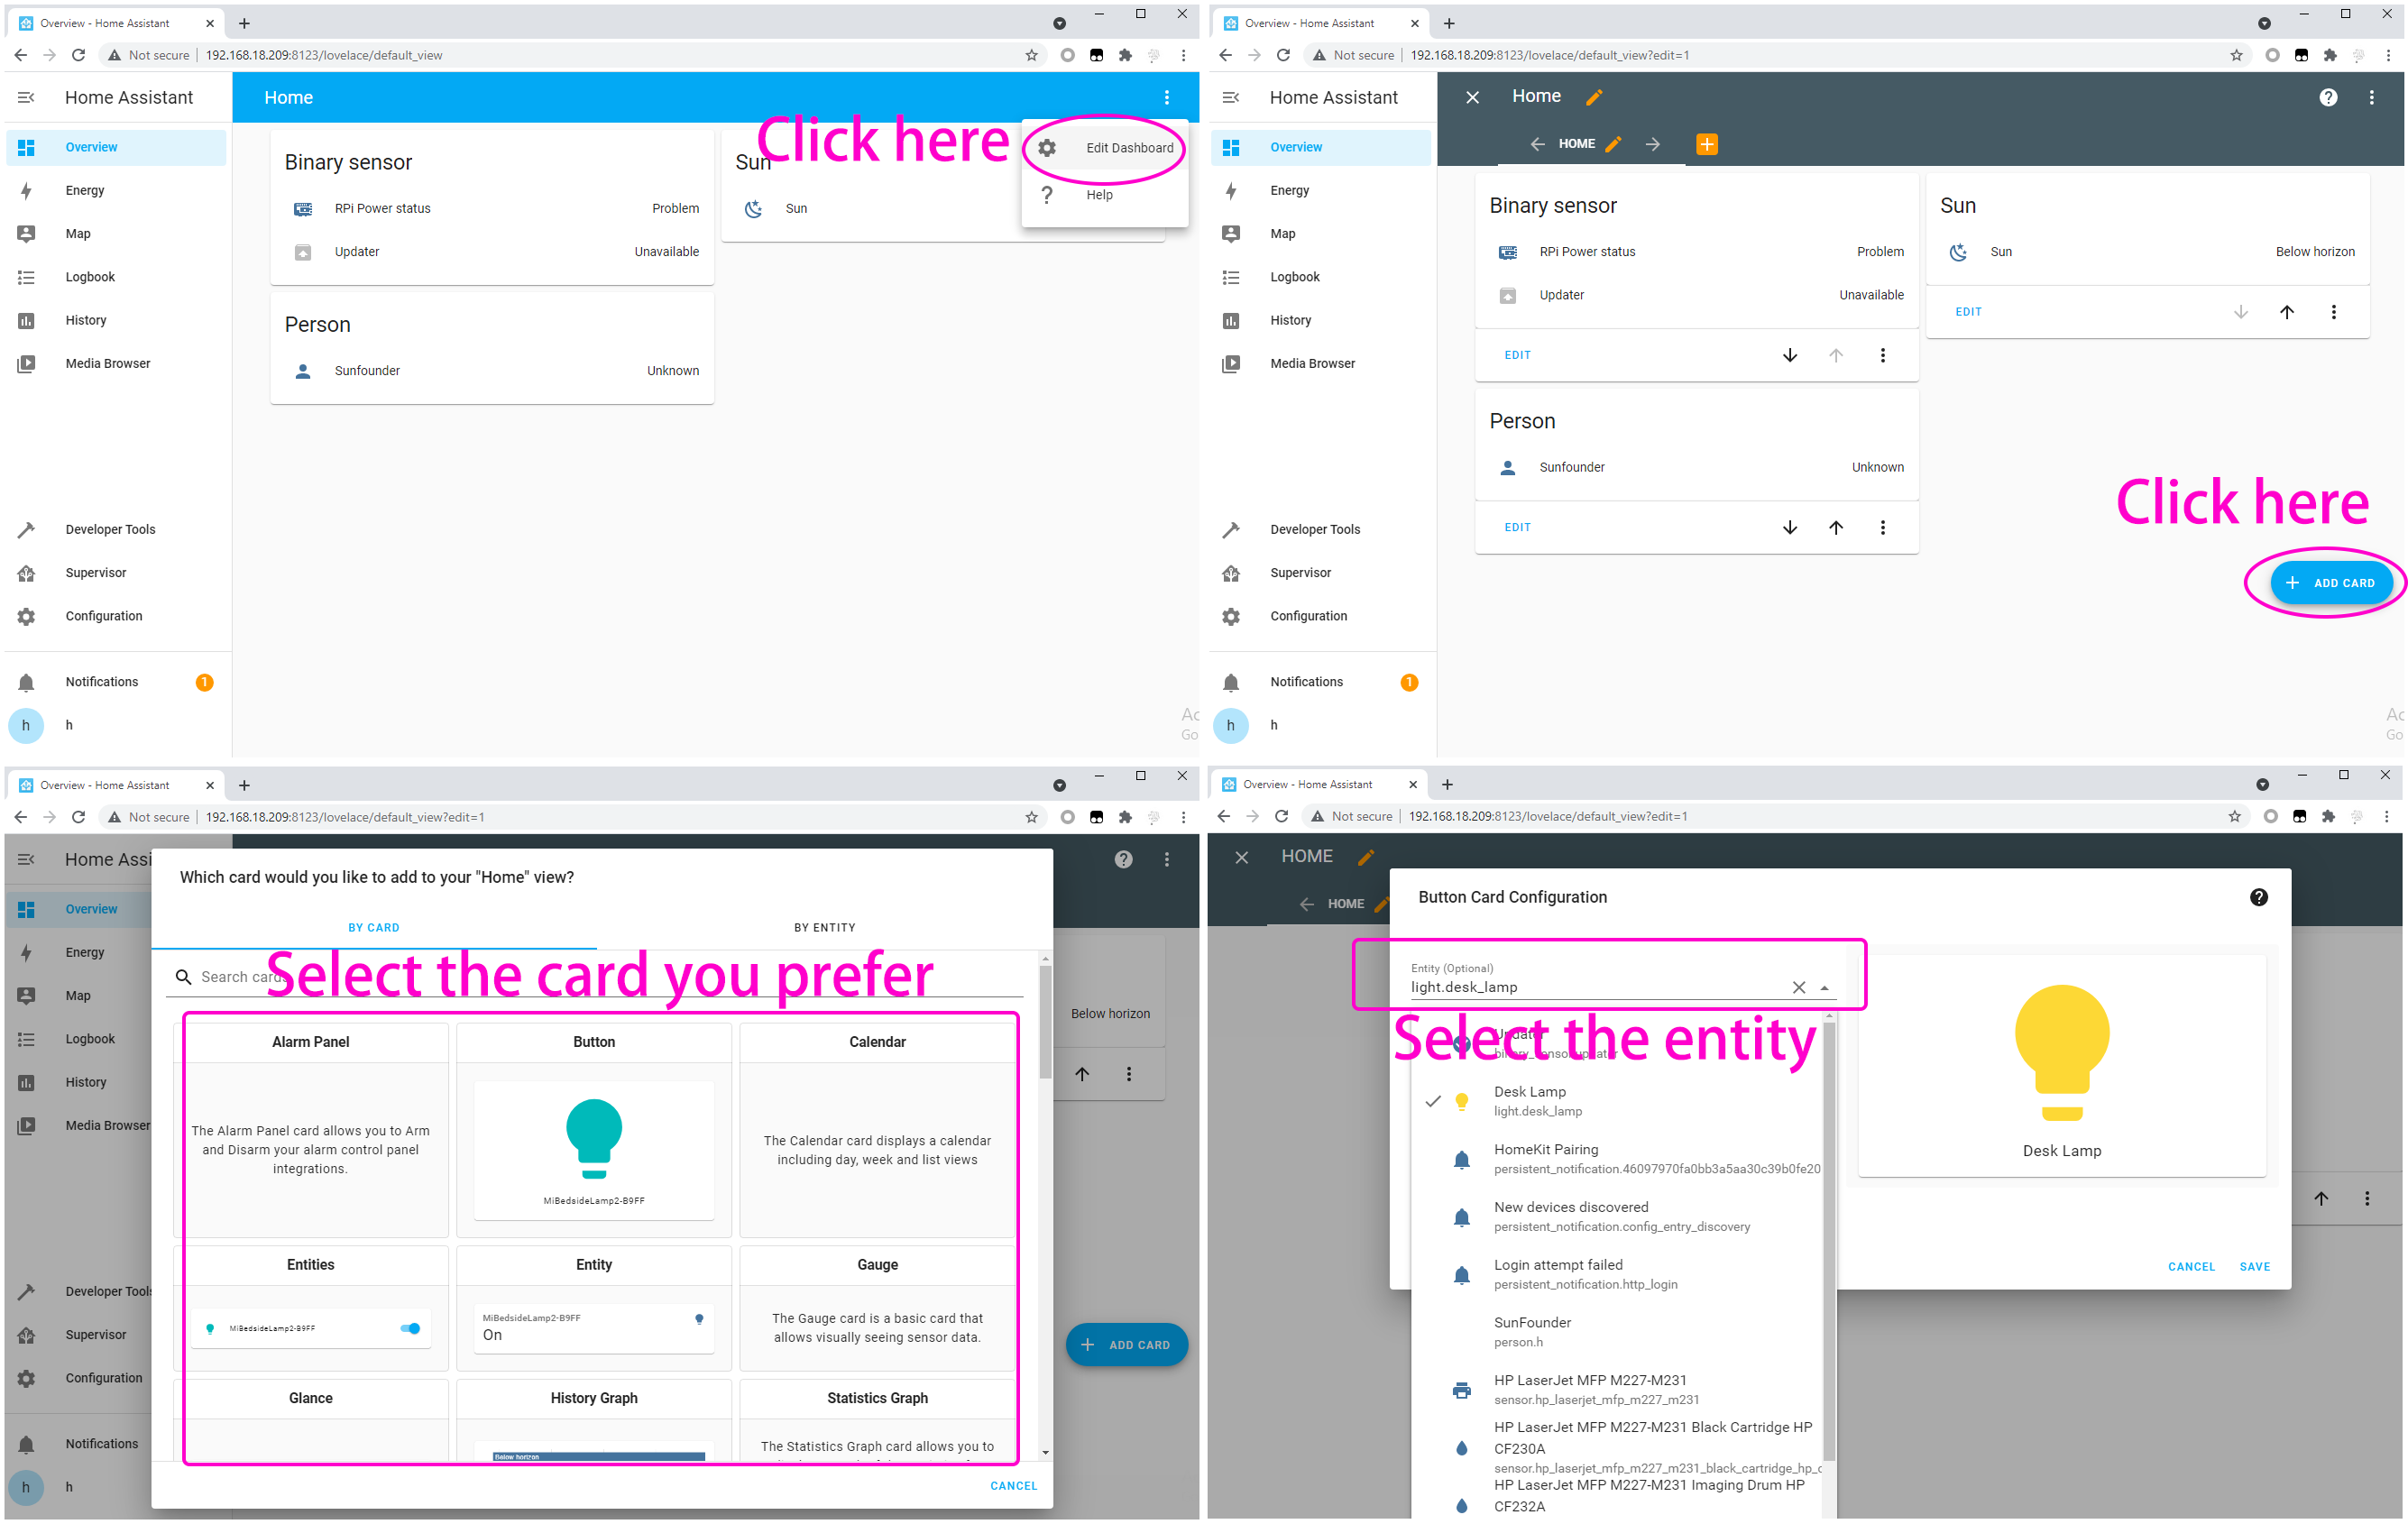
Edit Dashboard
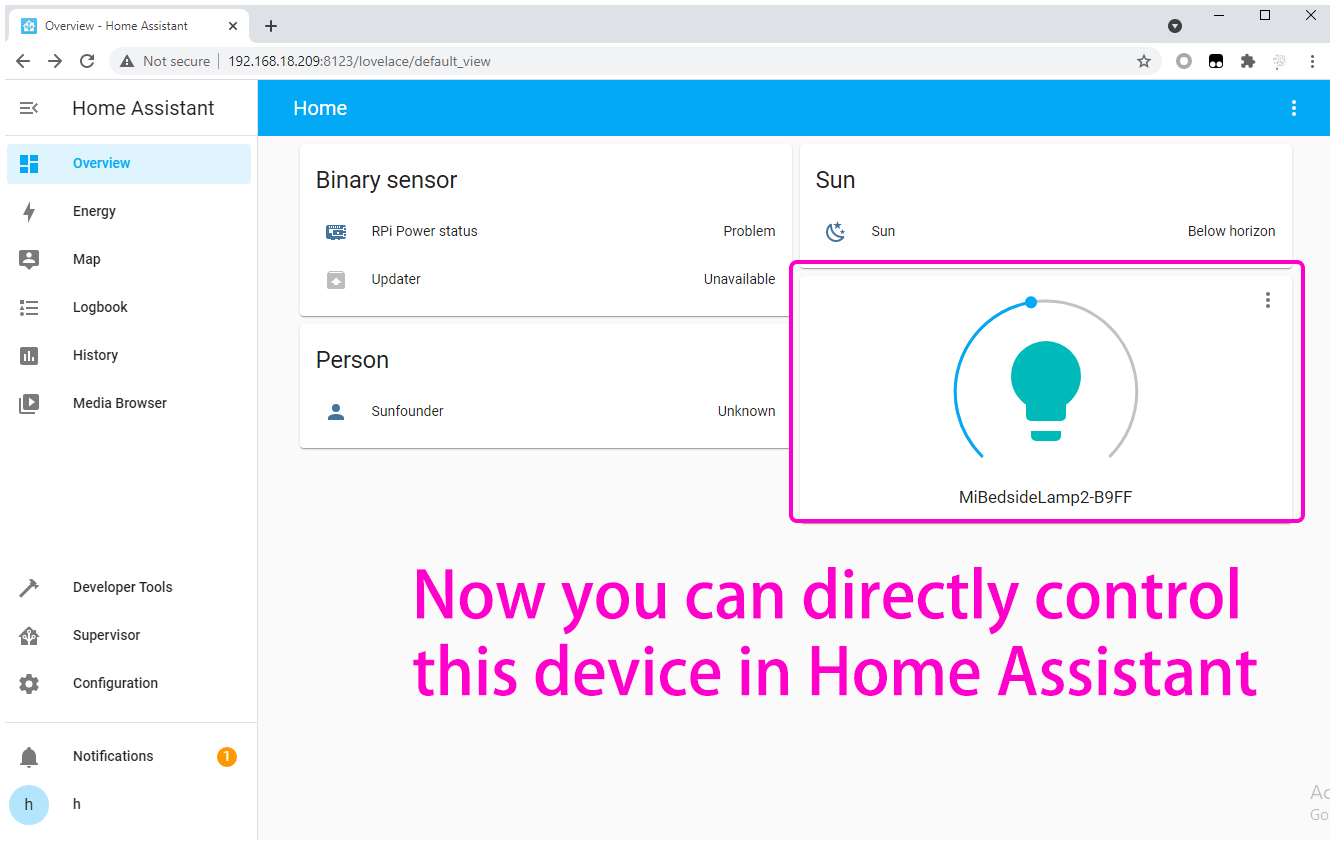
Now a CARD needs to be added to control this smart device.
Return to the Overview page. If the device you just added does not appear, you need to Edit Dashboard.
Click Overview –> Edit Dashboard –> ADD CARD, you can select the corresponding CARD according to your needs, for example, select Button here, and then select the corresponding Entity.
After adding the corresponding card, click Done to exit editing, and then you can control your smart device.